Monday, September 9, 2019

The Symmetry in a Basic Temple

The Symmetry in a Basic Temple by Cassandra Hulbert
MATH 401 
9 September 2019

About My Print:I generated my inspiration for this project from my recent trip to Tokyo, Japan. The temples within Japan date as far back as the early 7thcentury and are found in abundance throughout the country. Early construction centered around nature, aesthetic, and symmetry. I wanted a three story pagoda, with each floor slightly smaller than the previous and a characterizing lightning rod. The idea was simple enough, but required a composite of different techniques within OpenSCAD to create. The object puts to work several of the techniques learned in week 1 tutorials. 
  
Creation Process:With the use of entirely cubes and cylinders, this object was able to be stacked and formed. Starting on the lower level, a cube of [20,20,6] measurements was developed, with a difference cube of [20,5,3] to cut out a doorway. To top the “main room”, I developed a cylinder which was pinched at the top, flattened, then adjusted to 4 facets, ($fn = 4), to create a square-based with a sliced top, also known as a frustum. I repeated this process of a cube topped with a frustum, with each overhead layer having smaller dimensions (of -5 in length and width), until I got to base layer 3. The cylinder which made up the rod, with a radius of only .5, was of relatively small-scale dimensions. The hanging edges in the rendering of my code proved to be a slight problem when it came to print time. Nevertheless, my object was now ready to be printed.
Printing Process:The Ultimaker Cura put my print time at roughly 2 hours. About 45 minutes in, the plastic starts to dip in where the edges hung. I had to stop my print, add supports in, and re-print. For it being my first print, I expected error, hoped for perfection. With the supports in and a smaller scale, my print was able to fit in the allotted timeframe. Ultimately, I was pleased with the quality, accuracy, and sturdiness of my final product. 

Spiky Star Wallpaper Pattern (*442)

Spiky Star Wallpaper Pattern (*442)
Savannah Crawford - MATH 401 F19


Over the summer I went to a summer school program in Vancouver, BC that was hosted by the Pacific Institute for the Mathematical Sciences. One of the courses in the program was on symmetries, specifically the 17 wallpaper groups for tiling the Euclidean plane.  So when Sander announced the topic for the assignment, this seemed like a natural fit for a project on symmetries.

In 1891, Evgraf Fedorov proved that there are 17 wallpaper groups which tile the Euclidean plane. The 17 groups are classified by their symmetries: mirror lines, points of rotation, and transitional symmetry. Using this approach, you can reduce seemingly different patterns to their symmetries and see that they are the same geometrically. Additionally, there's a cost function associated with each group, and the cost for all 17 groups is 2.


[This pattern belongs to *442 since there are two pints where 4 mirror lines intersect and one where 2 mirror lines intersect.]


My pattern is in *442 (Conway notation). It's one of the simplest groups. Graph paper is another example of *442, but my base shape is not a square so the pattern looks pretty interesting despite its group. Essentially, the base shape of my print is a spiky ring.


[Here is the spiky ring that generated the wallpaper.]

I tiled the base shape such that the edges overlap creating a grid with spikes. I left the edges round to showcase the geometry the original base shape.


[Final object to print]

Tiling on a Sphere

Tiling on a Sphere
Pantea Ferdosian
Course: Math through 3D printing (MATH 401)
George Mason University
Assignment 0

In this Assignment 0, we had to print an object based of our knowledge from the tutorials to illustrate symmetry or linear transformation. I chose to print an octagonal bipyramid in a heart of a sphere. In the following blog post, I will be explaining how I tried to illustrate both symmetry and linear transformation in my final 3D printed object.
An octagonal bipyramid (or dipyramid) is a polyhedron formed by joining two octagonal pyramids from their bases. That is in a way that the shared base of the two pyramids would be the primary symmetry plane that connects the pyramid to its mirror image. An octagonal pyramid has 16 triangle faces, 24 edges, and 10 vertices. All the faces of this bipyramid are isosceles triangles, meaning that it is face-transitive. Hence, all the faces lie within the same symmetry orbit.


The reason that I named this print “Tiling on a Sphere” because if you draw an imaginary sphere around this bipyramid, where all the vertices are tangible to the surface of the sphere, you will see a pattern of tiling on a sphere which represents the main domains of [4,2], 422 symmetry.

To help illustrate the tiling better, I designed the eight arcs to represents the planes of symmetry on imaginary sphere around the bipyramid.
I printed my object using the OpenSCAD and the Ultimaker. To hold the arcs aroung the bipyramid, I had to print using a little bit of support around the arcs and removed them later.


How I designed the print on OpenSCAD
Octagonal Bipyramid: first, I started by printing 2 cones, using the cylinder command, and adjusted the number of fragments (fn) to 8, so that I would get an orthogonal pyramid with 8 equal sides for the base. Then using the rotate command, I transformed one of them 180 degrees over the x-y plane so that it would give me a bipyramid.

Tiling of the sphere: I started off by printing 4 identical rings using the difference command and then I adjusted the degree of rotation so that every ring would be connected to the vertices of the bi-pyramid. 


Monday, June 3, 2019

Math MakerLab at Makerfaire NOVA

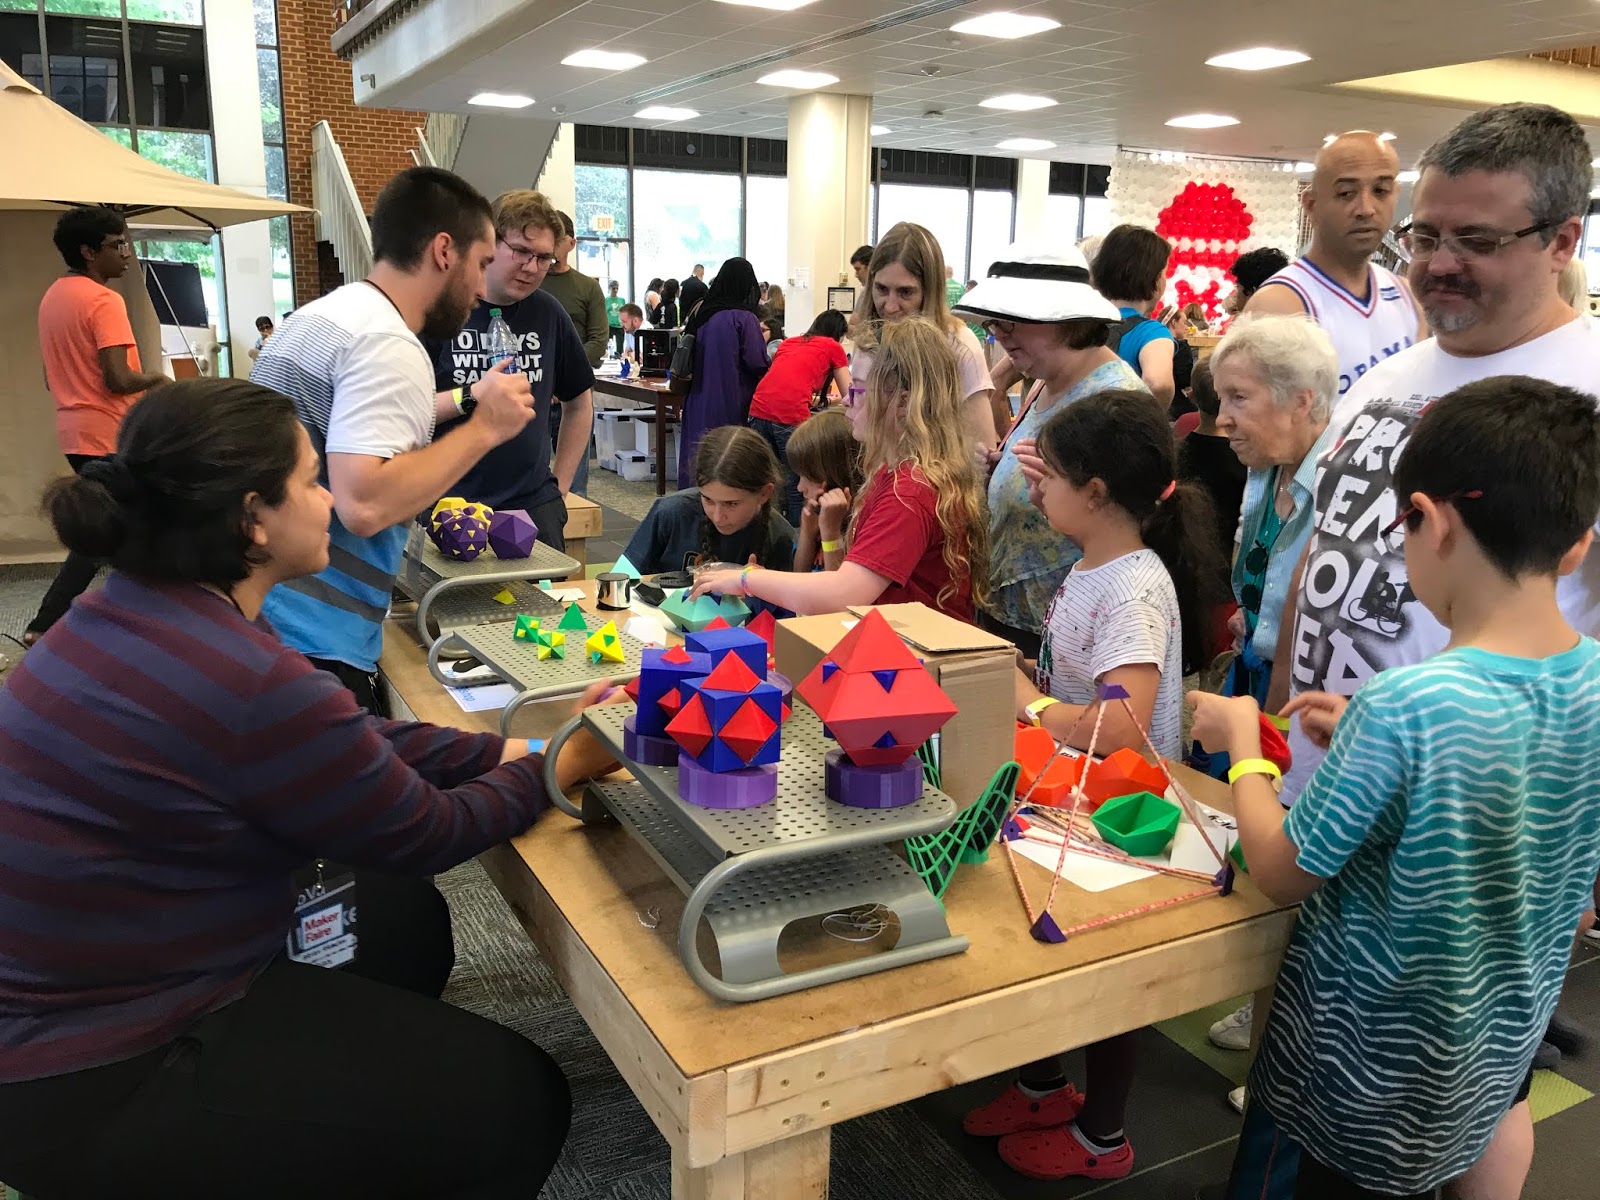
Patrick Bishop, Arsah Rahman, and Evelyn Sander  had a constant great crowd lining up to talk about math at the Makerfaire NOVA. Lots of surprised looks to find out about plane tessellation's,  one-sided surfaces, the fact that there are only five regular solids, and the fact that they come in pairs (even though there are an odd number of them!). 


Thursday, May 2, 2019

GMU Math Makerlab Hosts Metaphor Students


Metaphor students visited GMU campus and got a presentation on 3D printing mathematics. 


Thursday, March 28, 2019

STEM Night Laurel Ridge

Math MakerLab participated in the Laurel Ridge  Elementary School STEM night on March 22, 2019!

Sunday, July 8, 2018

Steve Schluchter's Article on Tactile Graphs for a Blind Student

Steve Schluchter  recently published an article on his experience teaching a blind student at George Mason, including the tactile graphs previously described in this blog:  http://gmumathmaker.blogspot.com/2015/11/tactile-graphs-for-blind-math-student.html


https://nfb.org/images/nfb/publications/jbir/jbir18/jbir080105.html
Steve Schluchter, "Notes on Teaching Precalculus to a Blind Student in a College Precalculus Course," Journal of Blindness Innovation and Research, Vol 8, No 1 (2018).